Getting started (React Native Maps SDK)
Contents
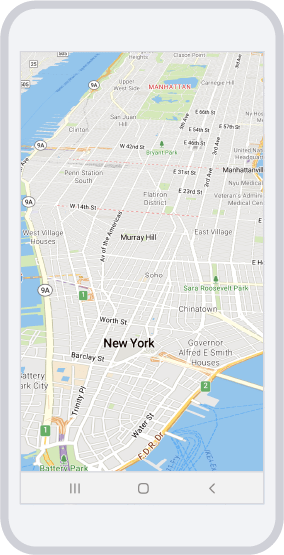
With the Trimble Maps Mobile Maps SDK for React Native, you can embed interactive, highly customizable maps into your Android and iOS applications. Our maps are built on commercial vehicle-specific data from Trimble Maps, which allows you to plan and visualize safe, legal, and efficient routes for all types of vehicles, around the world.
To gain access to the SDK, please contact our Sales team for more information.
This guide covers installation, authentication, and your first map. You can also view a working project in our GitHub sample app.
Packages
The React Native Maps SDK is published as modular npm packages under the @trimblemaps scope:
| Package | Purpose |
|---|---|
@trimblemaps/maps-react-native
| Declarative <Map>, <Camera>, layers, and Trimble-specific map features
|
@trimblemaps/account-react-native
| Account initialization and licensing (also re-exported from the maps package) |
@trimblemaps/services-react-native
| Geocoding, reverse geocoding, directions, avoid/favors, and routing profiles |
@trimblemaps/plugins-react-native
| Route display on the map, places search UI, and map place layers |
Install only the packages your app needs. The current release is 1.1.0 for all four packages. Use ^1.1.0 on each package you install (not *) so you stay on compatible 1.x builds. Check the sample app package.json for a known-compatible set.
Installing @trimblemaps/maps-react-native also installs @trimblemaps/account-react-native and @trimblemaps/services-react-native as dependencies. You still need those packages’ iOS Cartfile entries (see iOS installation).
Yarn:
# Maps (includes account dependency)
yarn add @trimblemaps/maps-react-native@^1.1.0

# Geocoding, reverse geocoding, avoid/favors
yarn add @trimblemaps/services-react-native@^1.1.0 @trimblemaps/account-react-native@^1.1.0

# Route display on the map (peer deps: maps + account)
yarn add @trimblemaps/plugins-react-native@^1.1.0 \
  @trimblemaps/maps-react-native@^1.1.0 \
  @trimblemaps/account-react-native@^1.1.0
npm:
npm install @trimblemaps/maps-react-native@^1.1.0
Expo (development build — not Expo Go; see Expo projects):
npx expo install @trimblemaps/maps-react-native@^1.1.0
@trimblemaps/plugins-react-native requires @trimblemaps/maps-react-native and @trimblemaps/account-react-native as peer dependencies.
Requirements
| React Native | 0.85.x tested with the sample app; package peer dependency is >= 0.80 |
| Architecture | New Architecture required (Fabric / TurboModules). Set newArchEnabled=true in your app.
|
| Android | minSdk ≥ 25 (26 if you also use the Navigation SDK)
|
| iOS | 15+. Use a physical device or the iOS Simulator on Apple silicon for development. Some Metal-heavy features may still require a physical device. |
| Access | Trimble Maps API key |
npm registry
@trimblemaps/* packages are published to the public trimblemaps-npm registry on Trimble JFrog. Configure the @trimblemaps scope in your package manager.
For Yarn 4:
# .yarnrc.yml
npmScopes:
  trimblemaps:
    npmRegistryServer: "https://trimblemaps.jfrog.io/artifactory/api/npm/trimblemaps-npm/"
For npm:
# .npmrc
@trimblemaps:registry=https://trimblemaps.jfrog.io/artifactory/api/npm/trimblemaps-npm/
Then run yarn install or npm install.
Expo projects
The maps package includes an Expo config plugin (app.plugin.js). When you run npx expo install @trimblemaps/maps-react-native, Expo may add "@trimblemaps/maps-react-native" to the plugins array in app.json or app.config.js.
Expo Go is not supported — you need a development build (npx expo run:ios or npx expo run:android) because the SDK ships custom native code.
The config plugin adds the iOS Podfile $RNTM.post_install(installer) hook during npx expo prebuild. It does not add the Android Maven repository or raise minSdkVersion; configure those with expo-build-properties:
{
  "expo": {
    "plugins": [
      "@trimblemaps/maps-react-native",
      [
        "expo-build-properties",
        {
          "android": {
            "minSdkVersion": 25,
            "extraMavenRepos": [
              "https://trimblemaps.jfrog.io/artifactory/android"
            ]
          }
        }
      ]
    ]
  }
}
Install the plugin package if it is not already in your project:
npx expo install expo-build-properties
Recommended order for Expo:
- Configure the npm registry (
.npmrc) and install@trimblemaps/maps-react-native. - On macOS, complete iOS Carthage at the app root before
npx expo prebuild. Run prebuild withRNTM_CARTHAGE_BUILD_PATHset (see step 4), or re-runpod installinios/with it set afterward. - Run
npx expo prebuildwhen you need nativeios/andandroid/folders, thennpx expo run:iosornpx expo run:android.
Do not hand-edit generated native projects for Trimble settings that the config plugin or expo-build-properties already apply — change app.json / app.config.js and prebuild again.
Android installation
Add the public Trimble JFrog Maven repository so Gradle can resolve native SDK artifacts. Use the pattern that matches your React Native template. For Expo, use Expo projects instead of editing Gradle files directly.
allprojects in android/build.gradle
Works with many React Native apps that declare repository blocks on the root project:
allprojects {
    repositories {
        mavenLocal()
        google()
        mavenCentral()
        maven {
            url "https://trimblemaps.jfrog.io/artifactory/android"
        }
    }
}
settings.gradle (newer Gradle layouts)
If your template centralizes repositories in android/settings.gradle, add the Trimble Maven URL there instead (inside pluginManagement.repositories, dependencyResolutionManagement.repositories, or your project’s equivalent block):
maven {
    url "https://trimblemaps.jfrog.io/artifactory/android"
}
Set minSdkVersion = 25 (or higher) in your Android ext block, run yarn install or npm install, then rebuild the app.
iOS installation
iOS setup has four steps: merge Cartfiles, run Carthage, configure the Podfile, then run CocoaPods with RNTM_CARTHAGE_BUILD_PATH so pod prepare_command steps link XCFrameworks. Complete them in this order. Carthage must finish before pod install.
1. Create a merged Cartfile
Each @trimblemaps/* package ships a Cartfile under node_modules after install. Copy the binary lines from every Cartfile you need into a single Cartfile at your app root (next to package.json). Keep one line per framework — skip duplicates when multiple packages list the same dependency.
When you install only @trimblemaps/maps-react-native, merge all of these (the maps package depends on account and services):
node_modules/@trimblemaps/maps-react-native/Cartfilenode_modules/@trimblemaps/account-react-native/Cartfilenode_modules/@trimblemaps/services-react-native/Cartfile
The package Cartfiles contain only binary lines. To merge them without duplicates, run this from your app root:
for f in node_modules/@trimblemaps/*/Cartfile; do grep -E '^binary ' "$f"; done | sort -u > Cartfile
If two packages list the same framework at different versions (for example TrimbleMapsWebservicesClient), keep one line per framework, using the higher version. Package Cartfiles contain only binary lines — do not add third-party github entries (older sample Cartfiles may still list removed dependencies such as Polyline).
Example after installing the maps package (always confirm versions in your node_modules Cartfiles):
binary "https://trimblemaps.jfrog.io/artifactory/carthage/TrimbleMaps.json" == 2.1.1
binary "https://trimblemaps.jfrog.io/artifactory/carthage/TrimbleMapsAccounts.json" == 2.1.2
binary "https://trimblemaps.jfrog.io/artifactory/carthage/TrimbleMapsMobileEvents.json" == 1.0.0
binary "https://trimblemaps.jfrog.io/artifactory/carthage/TrimbleMapsWebservicesClient.json" == 2.2.0
binary "https://trimblemaps.jfrog.io/artifactory/carthage/Turf.json" == 1.1.0
If you install the plugins package as well, merge its Cartfile too (it adds RoutePlugin, RoutingProfilesPlugin, SearchUIPlugin, and TrimbleMapsMultiplatformUI). Refer to the sample app’s Cartfile for a full four-package example.
2. Run Carthage
Use Carthage 0.40 or later. The legacy --cartfile flag was removed; Carthage reads Cartfile from the project directory (the folder that contains Cartfile and Carthage/).
From your app root (next to package.json):
carthage bootstrap --platform iOS --use-xcframeworks
If you change the Cartfile after the first bootstrap, fetch new binaries with:
carthage update --platform iOS --use-xcframeworks
If you run the command from ios/, pass the app root with --project-directory:
cd ios
carthage bootstrap --platform iOS --use-xcframeworks --project-directory ..
This creates Carthage/Build at the app root. Add Carthage/ to .gitignore — the binaries are large and should not be committed. Carthage artifacts are fetched from trimblemaps.jfrog.io.
3. Configure the Podfile and run CocoaPods
Add $RNTM.post_install(installer) to the post_install block in your ios/Podfile:
post_install do |installer|
  # Other post install hooks (for example react_native_post_install)...
  $RNTM.post_install(installer)
end
$RNTM is not defined in your app — it is provided by the @trimblemaps/maps-react-native podspec when CocoaPods resolves native modules. The hook wires Carthage framework search paths into the Xcode build. You only need this line when @trimblemaps/maps-react-native is installed. Expo: the config plugin adds this hook during prebuild.
4. Link XCFrameworks for CocoaPods
CocoaPods vendors Trimble XCFrameworks from each package’s ios/Frameworks directory. Each @trimblemaps/* podspec has a prepare_command that symlinks the frameworks from your Carthage/Build folder into the package during pod install. Set RNTM_CARTHAGE_BUILD_PATH to your Carthage build folder when you run CocoaPods (from the app root):
cd ios
RNTM_CARTHAGE_BUILD_PATH="$(cd .. && pwd)/Carthage/Build" pod install
pod install fails with a clear error if a required framework is missing from that folder. In that case, check that your merged Cartfile includes every package’s frameworks and re-run Carthage.
For Expo, set the same variable when you run prebuild:
RNTM_CARTHAGE_BUILD_PATH="$(pwd)/Carthage/Build" npx expo prebuild
The sample app automates Cartfile generation, Carthage, and pod install with yarn ios:setup. See the sample README Native setup scripts section for what each step does.
Rebuild the app after pod install.
Android permissions
Add location permissions to your AndroidManifest.xml if you plan to display the user’s location on the map:
<uses-permission android:name="android.permission.ACCESS_FINE_LOCATION" />
<uses-permission android:name="android.permission.ACCESS_COARSE_LOCATION" />
Request runtime permission before enabling location tracking. See Location and tracking and the Android location permissions guide.
iOS permissions
Enable Location Updates under Background Modes in your Xcode project’s Signing & Capabilities tab. Add usage descriptions to Info.plist:
<key>NSLocationWhenInUseUsageDescription</key>
<string>Your precise location is used to show your location on the map.</string>
<key>NSLocationAlwaysAndWhenInUseUsageDescription</key>
<string>Your precise location is used to show your location on the map.</string>
iOS shows the system permission dialog when your app first accesses location, as long as these keys are present.
Authentication
Initialize the TrimbleMaps account with your API key before rendering a map. The account must reach a licensed state before style and tile requests succeed. Run initialization from a useEffect (or similar) — do not use top-level await in a React component file.
import { useEffect, useState } from "react";
import {
  Account,
  AccountManager,
  APIEnvironment,
  LicensedFeature,
  Map,
  Camera,
  TrimbleMaps,
} from "@trimblemaps/maps-react-native";

function App() {
  const [ready, setReady] = useState(false);

  useEffect(() => {
    let cancelled = false;

    (async () => {
      await AccountManager.initialize(
        new Account({
          apiKey: "YOUR_TRIMBLEMAPS_API_KEY",
          apiEnvironment: APIEnvironment.Production,
          licensedFeatures: [LicensedFeature.MapsSDK],
        }),
      );
      await AccountManager.awaitInitialization();

      const licensed = await AccountManager.isLicensedForMaps();
      if (!licensed) {
        console.warn("Trimble Maps license is not active for this API key.");
      }

      if (!cancelled) {
        setReady(true);
      }
    })();

    return () => {
      cancelled = true;
    };
  }, []);

  if (!ready) {
    return null;
  }

  return (
    <Map mapStyle={TrimbleMaps.StyleURL.MobileDay} style={{ flex: 1 }}>
      <Camera initialViewState={{ center: [-74.006, 40.7128], zoom: 12 }} />
    </Map>
  );
}
The <Map /> component defers its initial style load until the account reaches a ready state, which avoids a race when initialization is handled in JavaScript.
Coordinates use GeoJSON order: [longitude, latitude].
Built-in styles are available on TrimbleMaps.StyleURL:
| Constant | Style |
|---|---|
TrimbleMaps.StyleURL.MobileDay
| Mobile Day |
TrimbleMaps.StyleURL.MobileNight
| Mobile Night |
TrimbleMaps.StyleURL.MobileSatellite
| Mobile Satellite |
Development-time log messages
With a maps-only API key, you may still see HTTP 401 log lines for optional map components such as traffic or weather, even when you do not enable those layers. The map can render normally. In React Native development builds, these messages may appear in the red LogBox overlay. They are expected when your key is not licensed for those features.
TypeScript and Expo
If tsc reports errors inside @trimblemaps/maps-react-native source files (for example under node_modules/@trimblemaps/maps-react-native/src), Expo may be resolving the react-native export condition to TypeScript sources. Current package versions declare a types export that TypeScript resolves first, so this should not occur. If you see it with an older build, set "customConditions": [] in your app’s tsconfig.json so TypeScript uses the published .d.ts files. This affects type-checking only; Metro bundling is unchanged.
Next steps
- Creating a map view — camera control and map styles
- Visualizing data — GeoJSON sources and layers
- Trimble layers — traffic, weather, 3D buildings, POI, truck restrictions
- Migrating from the legacy SDK — upgrade from
maps-reactnative-sdk - React Native Navigation SDK — turn-by-turn guidance with
@trimblemaps/navigation-react-native(AndroidminSdk26 for navigation)